In this article, we’ll configure the certificates necessary to set up an IKEv2 VPN in pfSense.
Articles in This Series:
Part 1 (Current Article)
Part 2 – VPN Configuration
Part 3 – Mobile Profile Configuration
Part 4 – On Demand VPN
This was setup and configured with the following: macOS 10.13 High Sierra Beta (should work with 10.12+, possibly older), and Apple Configurator 2.5 Beta (available from the Apple Developer site/release available on the App Store; should work with prior versions).
This tutorial has its foundation in a thread1 on the pfSense Forums, however I have made some changes that will be outlined here. Let’s get started!
Part 1 – Certificates
1. Create the CA Certificate (System\Cert. Manager\CAs)
- Click the + Add button to add a new CA and use the following settings:
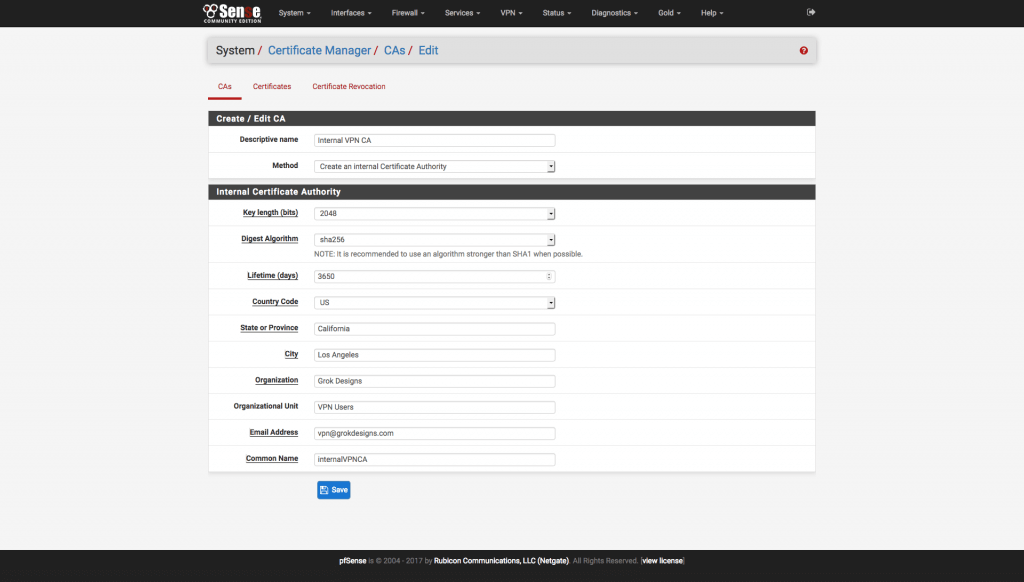
Figure 1 pfSense Create CA Page - Descriptive Name: An easily identifiable description. I use “Internal VPN CA”.
- Method: Create an Internal Certificate Authority
- Key Length: 2048
- Digest Algorithm: SHA256
- Lifetime: 3650 days
- Country Code: Your Country Code (e.g. “US” for the United States)
- State: Full State Name (e.g. “California”, not “CA”)
- City: City Name
- Organization: As Desired
- Organizational Unit: Optional (I usually put something like “VPN Users”)
- Email address: As Desired
- Common Name: An easily identifiable name, with no spaces, for the certificate to use. I use “internalVPNCA”

Save the certificate.
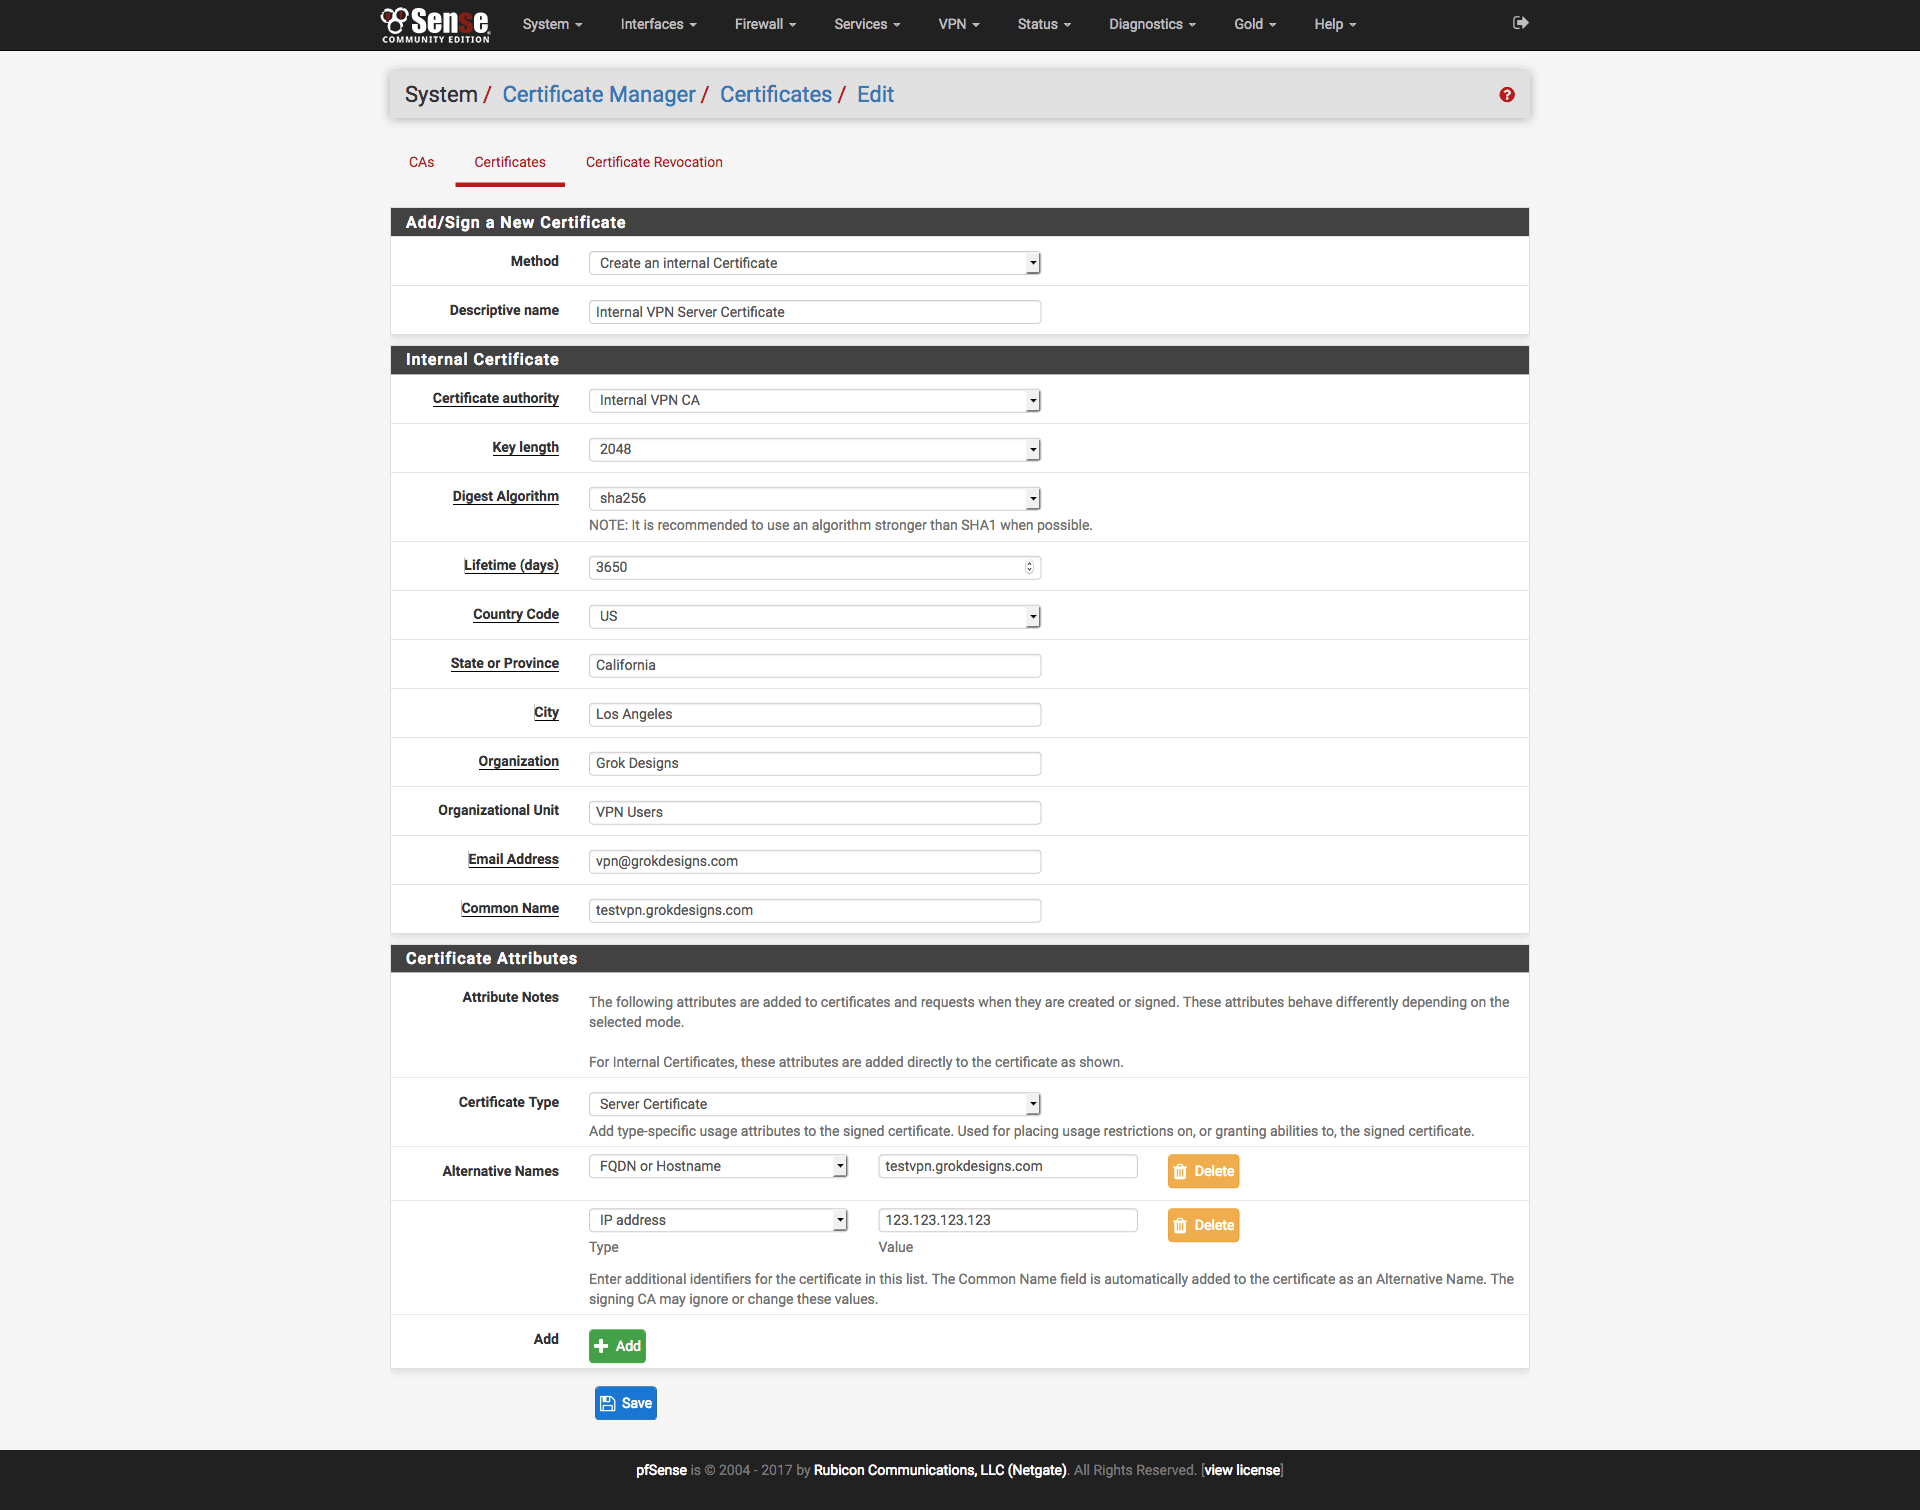
2. Create the Server Certificate (System\Cert. Manager\Certificates)
- Click the + Add/Sign button to add a new certificate and use the following settings:
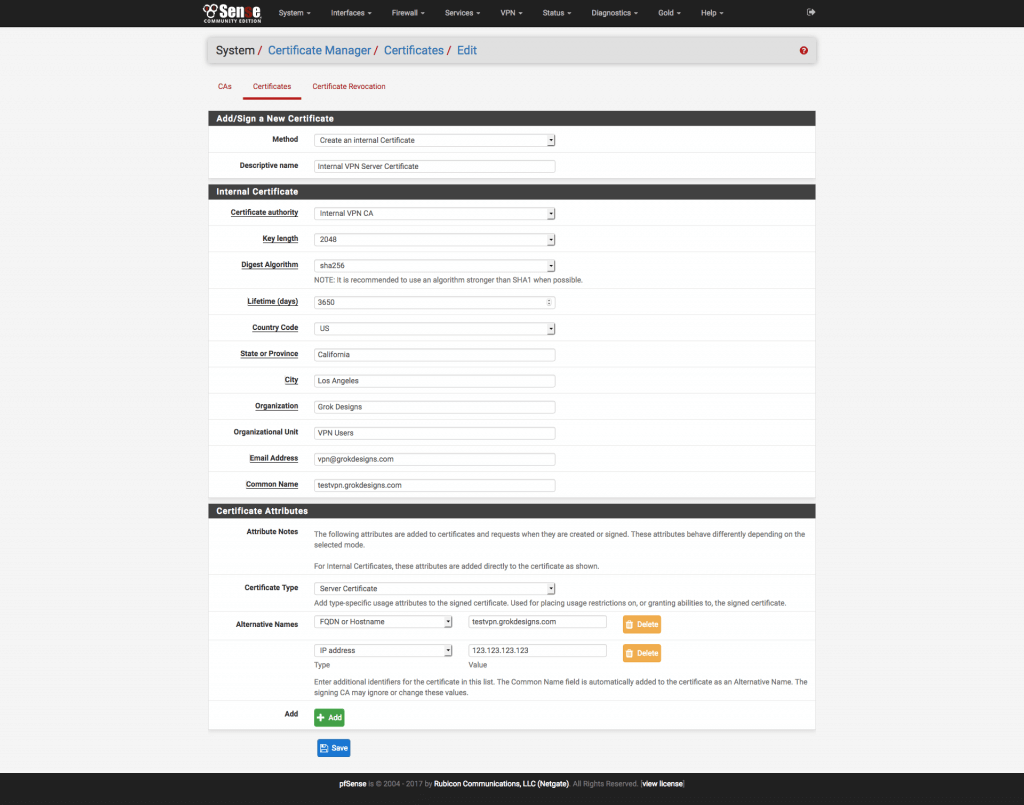
Figure 2 pfSense Create Server Certificate Page - Method: Create an internal certificate
- Descriptive Name: An easily identifiable description. I use “Internal VPN Server Certificate”.
- Certificate Authority: Internal VPN CA (or the name you used in the previous section)
- Key Length: 2048
- Digest Algorithm: SHA256
- Lifetime: 3650 days
- Country Code: Your Country Code (e.g. “US” for the United States)
- State: Full State Name (e.g. “California”, not “CA”)
- City: City Name
- Organization: As Desired
- Email address: As Desired
- Common Name: The external DNS name of your pfSense machine.
- Certificate Type: Server Certificate
- Add an alternative name
- Type: DNS (case sensitive)
- Value: Same as Common Name (external DNS name)
- Add an alternative name (for static IP only)
- Type: IP (case sensitive)
- Value: External IP of your pfSense machine
Save the certificate.
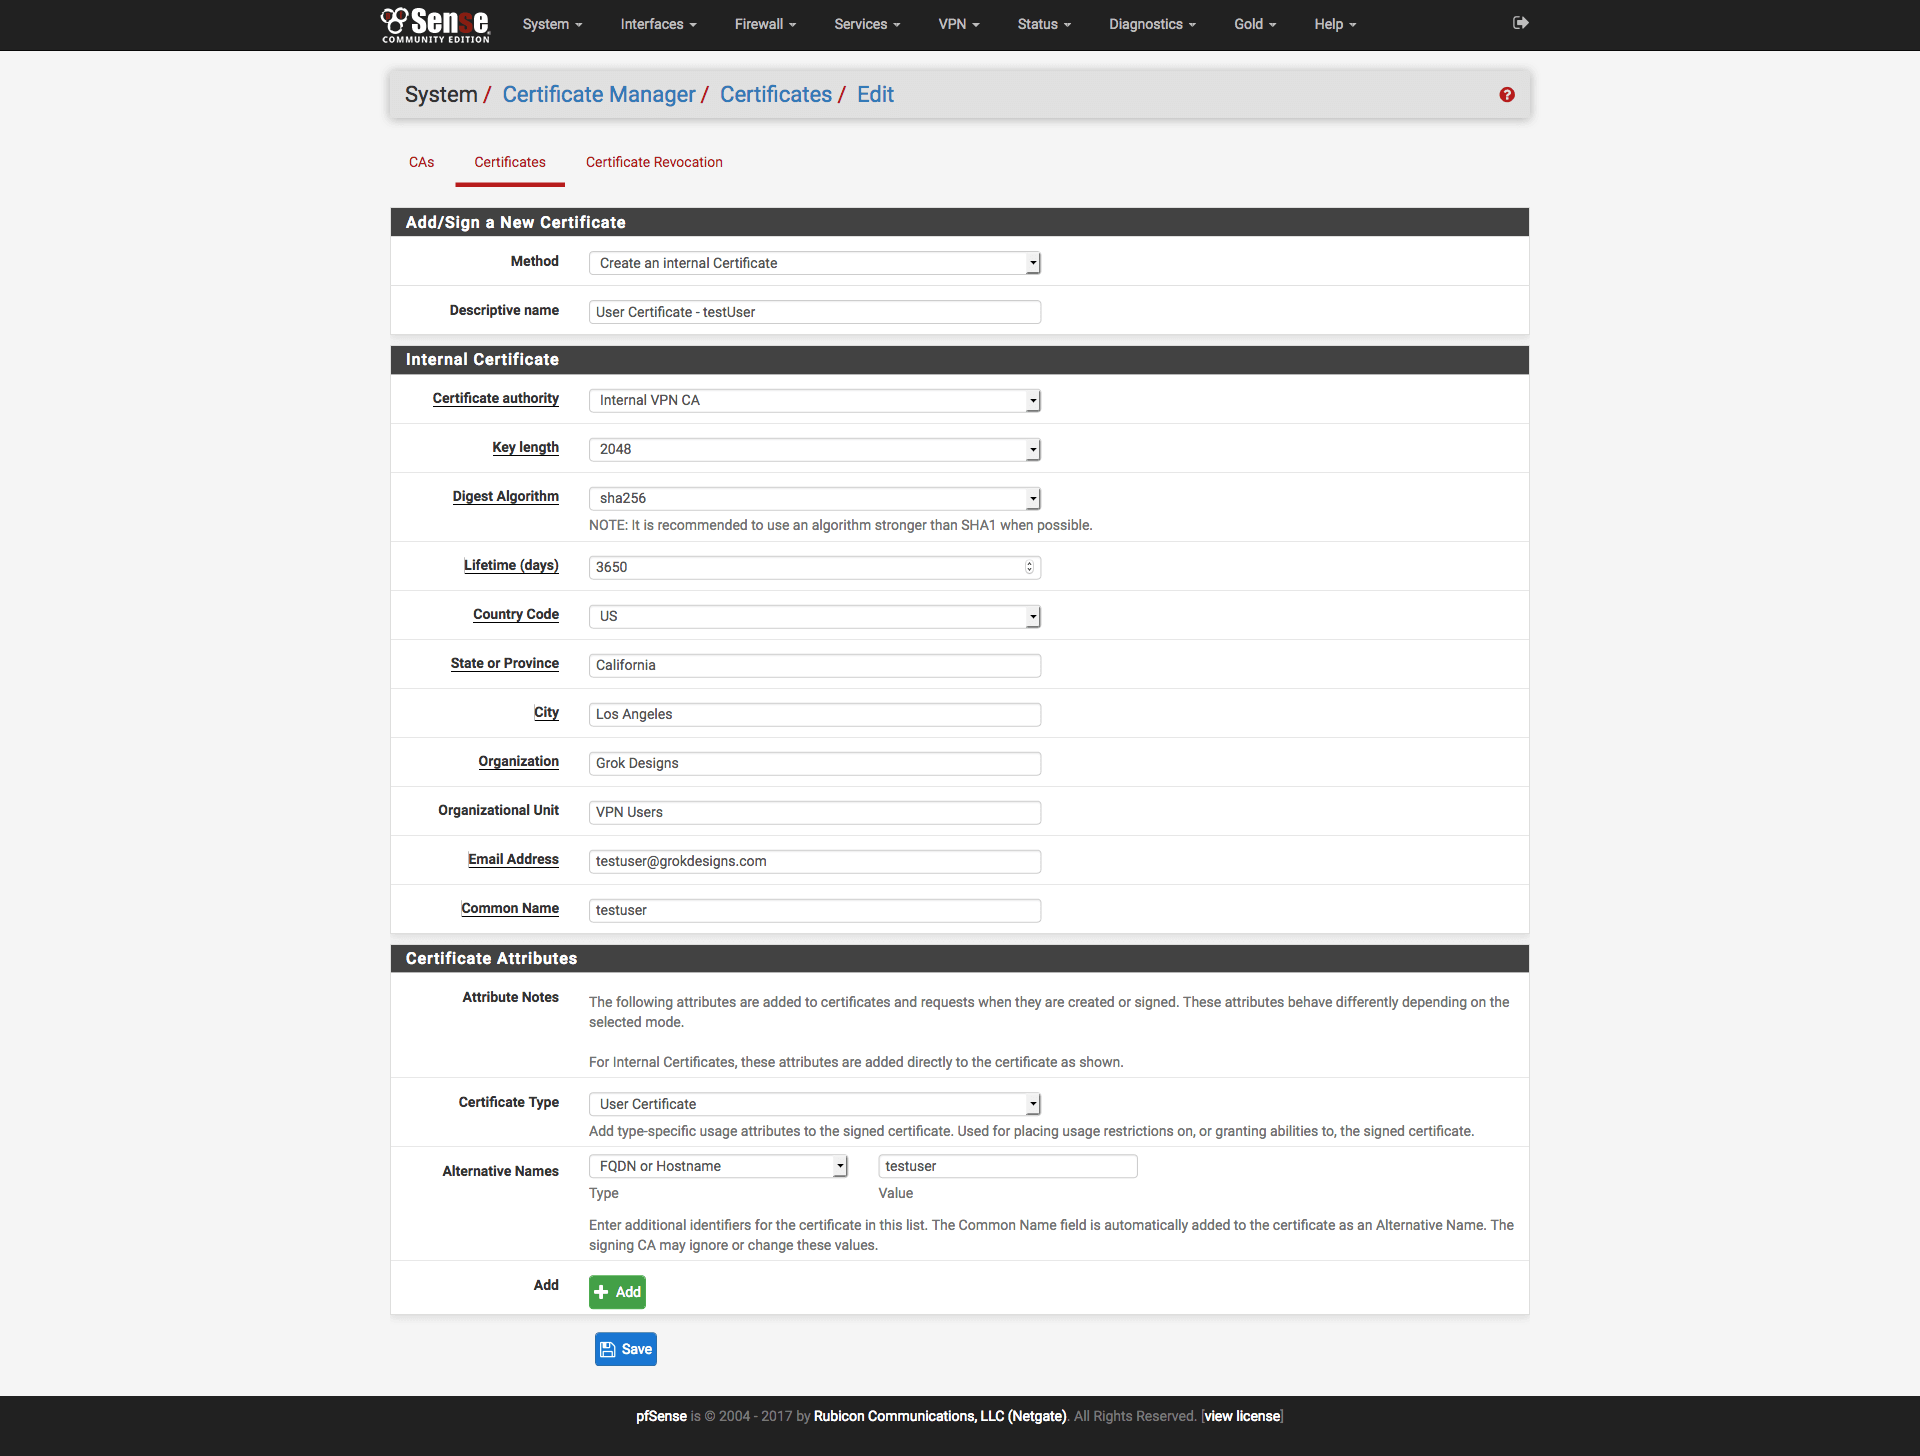
3. Create the User Certificate(s) (System\Cert. Manager\Certificates)
We are only creating one in this example, but you can create as many user certificates as you need for multiple users/devices.
- Click the + Add/Sign button to add a new certificate and use the following settings:
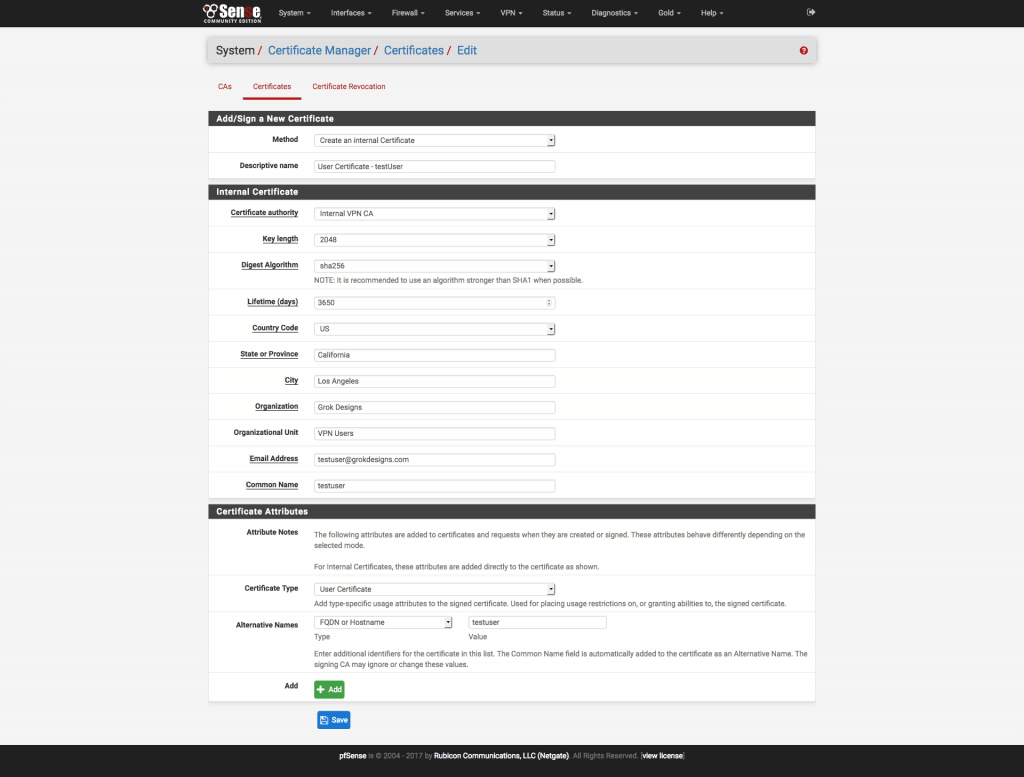
Figure 3 pfSense Create User Certificate Page - Method: Create an internal certificate
- Descriptive Name: An easily identifiable description. I use “User Certificate – name“.
- Certificate Authority: internalVPNCA (or the name you used in the CA section)
- Key Length: 2048
- Digest Algorithm: SHA256
- Certificate Type: User Certificate
- Lifetime: 3650 days
- Country Code: Your Country Code (e.g. “US” for the United States)
- State: Full State Name (e.g. “California”, not “CA”)
- City: City Name
- Organization: As Desired
- Email address: As Desired
- Common Name: An identifier for this user/device (e.g., “bob”, “iPhone”, etc.)
- Add an alternative name
- Type: DNS (case sensitive)
- Value: Same as Common Name (user/device name)
Save the certificate.
3. Download the Certificates (System\Cert. Manager)
- On the CA tab, click the Export CA icon () to the right of the CA you created and save your CA certificate.
- On the Certificates tab, click the Export Certificate icon () to the right of the Server Certificate you created and save your server certificate.
- Still on the Certificates tab, click the Export Certificate icon () to the right of the User Certificate you created and save your user certificate. Then click the Export Key icon () to the right of the User Certificate you created and save your user certificate’s private key.
4. Create PKCS#12 File from User Certificate/Key
- For this step, you’ll need openssl installed. Hopefully you’re doing this on a Mac (as the tutorial is geared toward that), because it’s built in!
- Open the Terminal app, change to the directory where you saved your certificate files, and run the following command (replace file names with what you saved):
openssl pkcs12 -export -in userCert.crt -inkey userCert.key -out userCert.p12
When asked to enter an export password, choose something you’ll remember, as you will need it later when we get to the Apple Configuration portion.
Now, let’s configure a VPN! Take me to Part 2!
References
- …IKEv2 VPN for iOS and OSX Thread on pfSense Forums