In this article, we’ll configure an IKEv2 VPN in pfSense for our iOS and macOS devices to connect to.
Articles in This Series:
Part 1 – Certificate Configuration
Part 2 (Current Article)
Part 3 – Mobile Profile Configuration
Part 4 – On Demand VPN
At this point, we’ve configured our server certificates. Now let’s create the actual VPN.
Part 2 – IPSEC Configuration
1. Configure the Mobile Client Settings (VPN\IPsec\Mobile Clients)
- Use the following settings:

Figure 1 pfSense IPsec Mobile Client Settings - IKE Extensions: Checked
- User Authentication: Local Database
- Group Authentication: system
- Virtual Address pool: Provide a private IP scope that is not on your LAN. I like to use something in the 172.16.x.x range.
- Virtual IPv6 Address Pool: Unchecked
- Network List: Unchecked
- Save Xauth Password: Unchecked
- DNS Default Domain: Checked. Set to domain name of VPN LAN.
- Split DNS: Unchecked
- DNS Servers: Checked. Input your local DNS server(s)
- WINS Servers: Unchecked
- Phase2 PFS Group: Unchecked
- Login Banner: Unchecked

You may tweak these as needed. For example, you don’t have a local domain or want to provide a login banner to clients that support it.
Click the Save button. Apply the settings and click the + Create Phase 1 button that should appear at the top of the window. If it does not appear, navigate to the Tunnels tab and click the + Add P1 button.
2. Configure the Phase 1 Settings (VPN\IPsec\Tunnels)
- Use the following settings:

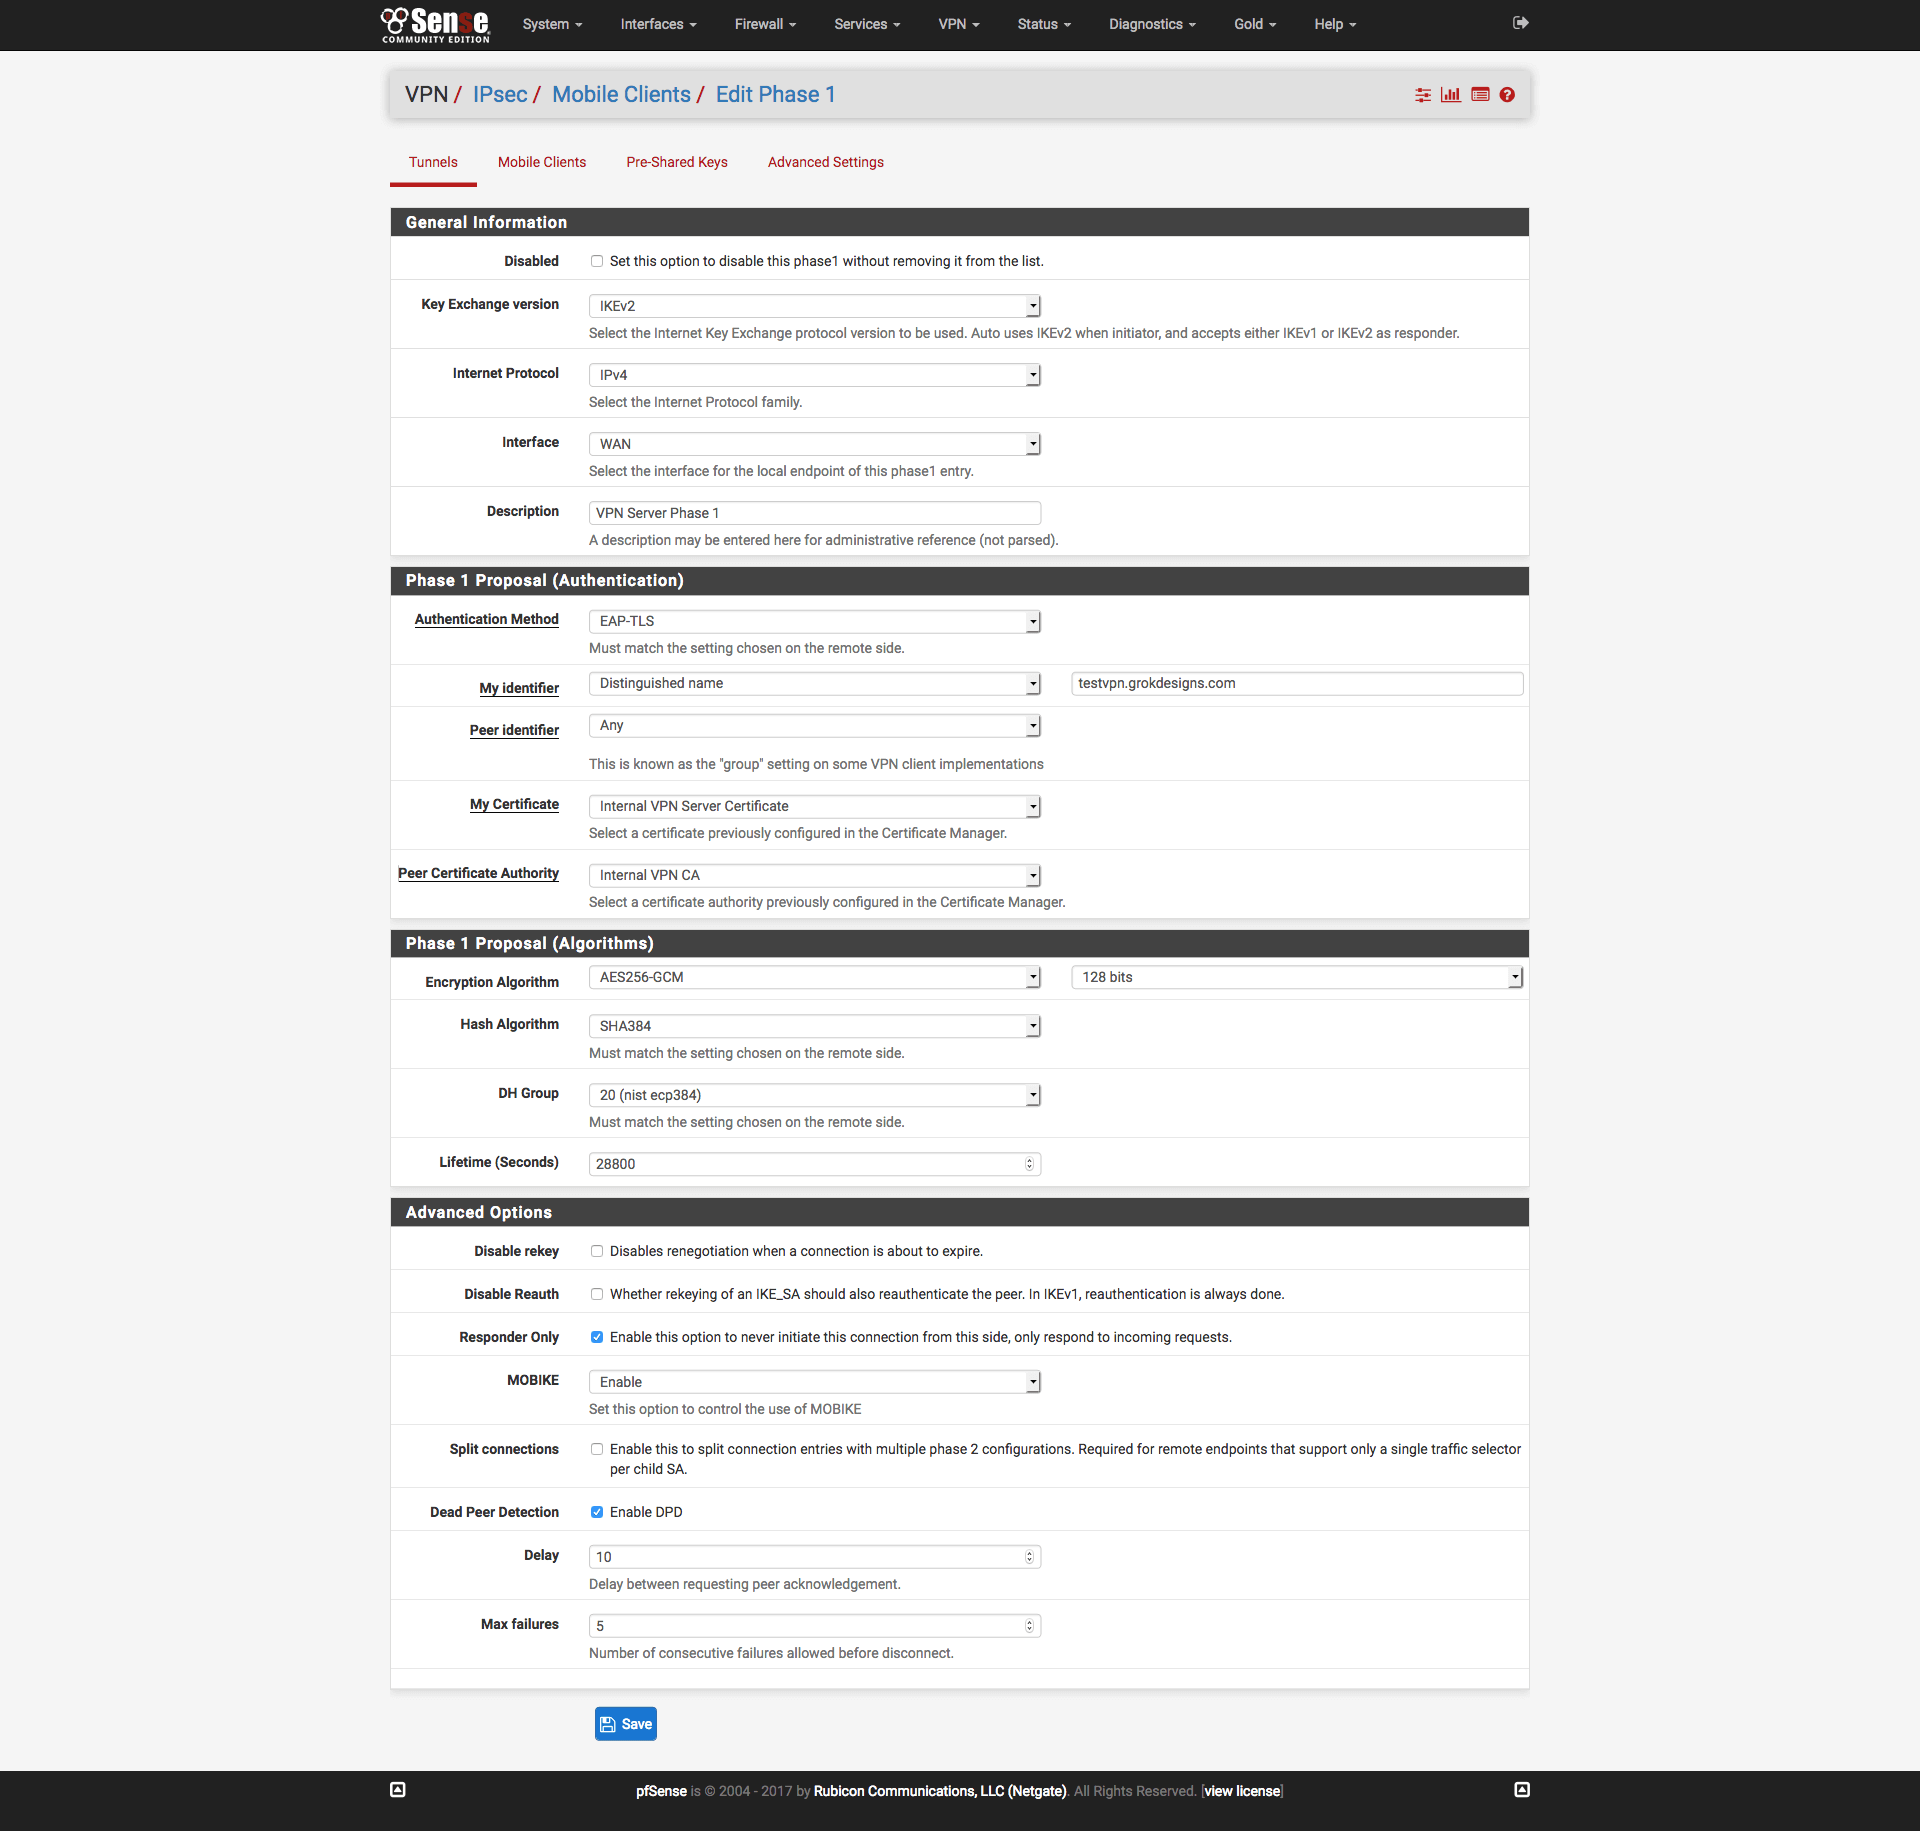
Figure 2 pfSense IPSEC Phase 1 Settings - Disabled: Unchecked
- Key Exchange version: IKEv2
- Internet Protocol: IPv4
- Interface: WAN
- Remote Gateway: None
- Description: An easily identifiable description. I use “VPN Server Phase 1”
- Authentication method: EAP-TLS
- My Identifier: Distinguished Name. Use the value of the external DNS
name of the pfSense (the same as you used when making the server
certificate). - Peer Identifier: Any
- My Certificate: Internal VPN Certificate (or whatever you named the server certificate)
- Peer Certificate Authority: internalVPNCA (or whatever you named the CA)
- Encryption algorithm: AES256-GCM1 – 128 Bits
- Hash algorithm: SHA384
- DH key group: 20 (nist ecp384)
- Lifetime: 28800 seconds
- Disable Rekey: Unchecked
- Disable Reauth: Unchecked
- Responder Only: Checked
- MOBIKE: Enable
- Split Connections: Unchecked
- Dead Peer Detection: Checked/Delay: 10 Seconds/Max Failures: 5
Click the Save button. Apply the settings.
3. Configure the Phase 2 Settings (VPN\IPsec\Tunnels)
From the Tunnels page, click the Show Phase 2 Entries button underneath the Phase 1 entry you just created. Click the Add P2.
- Use the following settings:
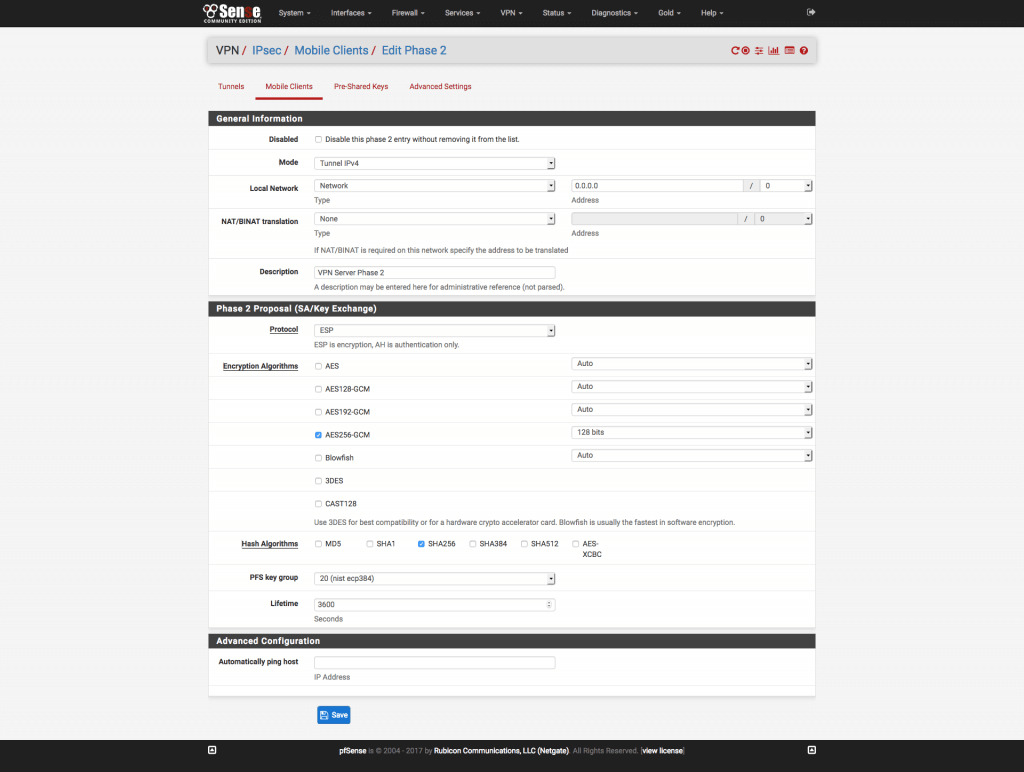
Figure 3 pfSense IPSEC Phase 2 Settings - Disabled: Unchecked
- Mode: Tunnel IPv4
- Local Network: Type: Network: 0.0.0.0/0 (This will route all traffic over the VPN. But I Want to Use Split DNS)
- NAT/BINAT: Type: None
- Description: An easily identifiable description. I use “VPN Server Phase 2”
- Protocol: ESP
- Encryption Algorithms: AES256-GCM/128 Bits1
- Hash Algorithms: SHA256
- PFS Key Group: 20 (nist ecp384)
- Lifetime: 3600 Seconds
- Automatically Ping Host: None

Click the Save button. Apply the settings.
Congrats! You’ve just finished setting up your VPN. Now, how do you get it on your devices? While iOS and macOS offer the option to manually configure IKEv2 VPNs, because of the advanced settings we’ve used (AES-GCM1 and DH Group 20 in particular), we need to use a mobile profile to configure them and load them onto the device. Head on over to Part 3 for instructions!
But what about my non-Apple clients?! While this article is aimed at the configuration of the VPN for iOS and macOS clients, there are ways to make this work for other operating systems. Windows 10, much like iOS and macOS, does have built-in support for IKEv2 VPNs. However, also like iOS and macOS, the security we’ve chosen in this setup requires manual configuration through PowerShell. See the PowerShell Reference here: Set-VpnConnectionIPsecConfiguration Reference. Be mindful that in PowerShell, DH Group 20 is represented by the ECP384 option. I plan on testing this soon and will perhaps do a Part 5 for other clients.
UPDATE: See the comments on Part 4 for a discussion about supporting Windows 10 clients.
References